
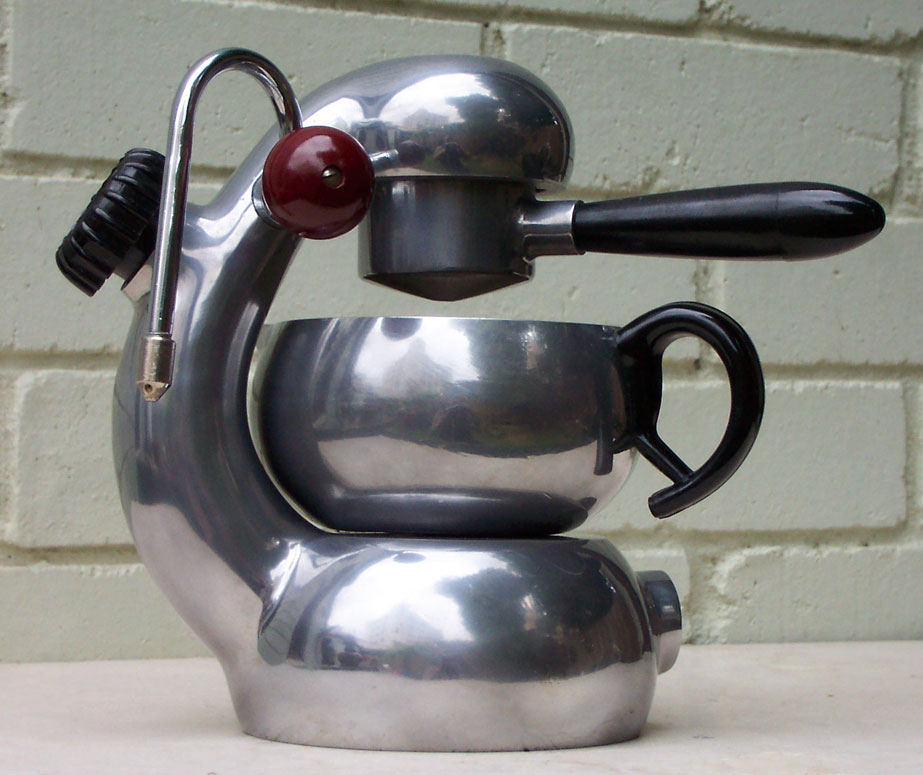
I first experimented with some old stale grinds just to get it going and figure out how much coffee and water to use. Then I made my first drinkable cup. My initial impressions where disappointing to say the least. It tasted exactly like a stove top coffee, with that over-roasted dark taste. I was hoping for something closer to espresso machine quality.
I did allot of reading about coffee and water quantities, temperature, flow rate and tamping. The thing you can't really control with the Atomic is temperature. It does require quite allot of heat to pressurise the chamber, however, the good thing is that the head only heats up once the flow starts. Other things you can do to lower the heat, is to add boiling water and to leave the steamer valve open till it starts hissing, then shut the valve to start the extraction. That way the pressure shoots up faster and the extraction starts sooner after the water makes contact with the grind.
After about 7 or 8 goes, I managed to get a a good coffee. I mean really good!
This is how I make a large cappuccino (personally I have soy)
Specs:
Coffee Grind
|
Fine ground high quality! I use Campos. You can order pre-ground for
the Atomic
|
Coffee Quantity
|
Full small basket (3 table spoons)
|
Tamping
|
+-35kg pressure
|
Water
|
1 1/3 cup (1 base + ¼ cup shot + a bit for steaming) It's ok to add too much water, because you will swap out the cup once the shot has extracted.
|
Process:
- Boil the water pour into the machine and close the cap.
- Fill the small basket, tamp and attach the clamp.
- Open the steamer valve
- Place on medium size gas ring turned on full. Place cup below the clamp.
- Once steam hisses out of steam, close the steamer valve.
- Extraction should start. It should flow in a thin stream.
- Once 60ml (1/4 cup) has flowed (you'll need to estimate this), swap the cup for an empty cup to catch the "grey water".
- Steam the milk using the correct technique, i.e. dipping the tip of the nozzle in and out. I also have an Aldi milk heater/frother which gives me better tasting coffee, although this is probably because frothing technique needs perfecting.
- Pour the milk into the cup.